For Communication Setting for PLC Mitsubishi on Software PLC GX Developer, Step by Step :
Step 1
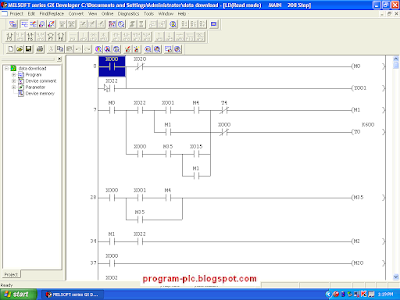
Open Software PLC Mitsubishi GX Developer

Step 2
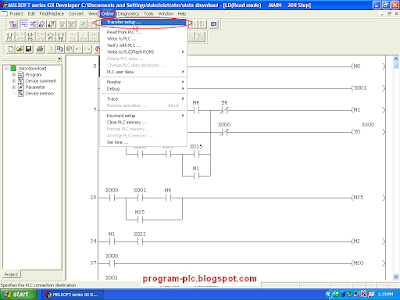
Click Online --> Click Tranfer setup ...

Step 3
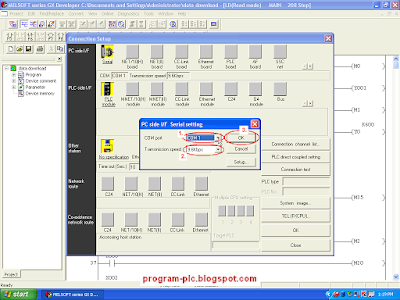
Show Menu Connection Setup
Click icon Serial
Show Dialog Box " PC side I/F Serial setting"
Step 4
Show Dialog Box " PC side I/F Serial setting"
Select COM Port --> Select Transmission speed --> Click OK Button

Step 5
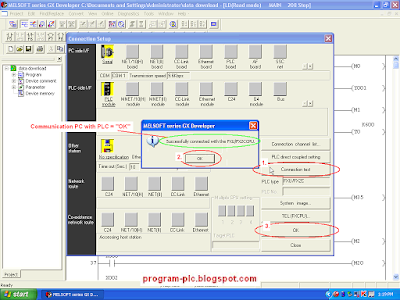
Display Menu Connection Setup
Click Connection test Button
If Communication OK Then Show Dialog Box "Successfully connected with the .... ( PLC Type )---> Click OK Button
Display Menu Connection Setup ---> Click OK Button

Video About Communication Settings for PLC Mitsubishi on PC
Labels:
Mitsubishi PLC
Mitsubishi PLC