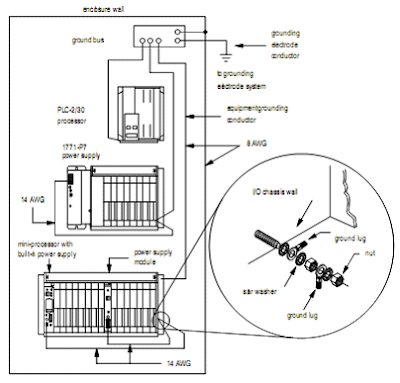
This Quick Start of programming mini PLC-2 is designed to help you quickly and connect a basic mini PLC-2 family programmable controller system. Below are the sequences how to use this Quick Start:
1. Install I/O chassis
• Configure I/O chassis
a. Set the backplane switches
b. Install keying bands
• Ground I/O chassis

2. Install I/O modules
• Install Field Wiring Arms
• Install I/O modules
a. Install each I/O module
b. Snap the field wiring arm for each I/O module onto horizontal bar of the I/O chassis and connect it to the module.
c. Remove the terminal cover from each wiring arm and connect the wires between the I/O devices and the wiring arm terminals.
d. Connect the power and ground wires.
e. Use tie wraps to gather the wires at each wiring arm, then bundle the wires so that the arm can pivot freely.
f. Replace the terminal covers and label the terminal status indicator appropriately.
3. Install Back up Battery and Memory Module
• Move the chassis POWER switch to the OFF position and turn off incoming power source.
• Unplug the power cable and lift the latch of the I/O chassis.
• Race the processor on a clean, flat surface with the bottom module facing you.
• Insert memory module into memory module slot.
• Side the processor into the I/O chassis.
• Connect the power cable and reapply power to the processor.
4. Install Processor and Power Supply.
5. Connect power to the Processor or Power Supply.
6. Connect Programming Terminal.