There are many ways to learn PLC. You can read textbook first to have basic understanding how PLC works or may read from free articles on internet. You could also join commercial course that will give access to material and practice. If you are a kind of person who like to learn autodidact or don’t want to spent huge amount of money in learning PLC, then this tutorial will help you most. I am sure went you learn by yourself, you will have challenge to practice your knowledge in real PLC. It’s an open secret that PLC is pricey for personal owning. So what you need is a kind of simulator that works like real PLC.
In this tutorial I will show you how to start program PLC in simulator without bothersome with installation of the simulator. It’s a free online PLC simulator. It’s works on many devices and OS (Operation System) as far as it have browser. To start programming your PLC let us abreast the following steps.
You will get the following capture.
The symbol you choose will disappear immediately.
To insert new rung at the position you want, you can use “Insert Rung” button. First you have to click the rung that you want to be under your new rung. Then click insert button. Your new rung will added above your chosen one.
To delete rung you have to click your intent rung first. Then click “Delete Rung” button. Your intent rung will disappear soon.
Video Demonstration: Learn PLC Programming Online
In this tutorial I will show you how to start program PLC in simulator without bothersome with installation of the simulator. It’s a free online PLC simulator. It’s works on many devices and OS (Operation System) as far as it have browser. To start programming your PLC let us abreast the following steps.
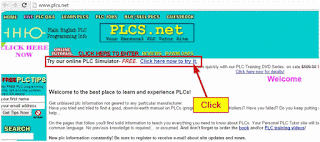
Step 1: Go to www.plcs.net and try online PLC Simulator
This website provide you many information and knowledge about PLC. It’s also give you a worthy free access to some resource to upgrade your skills. The last time I see this website provide free online PLC simulator is October 8, 2015. Maybe it will different when you read this tutorial.Step 2: Register to create new account
After click link to try PLC simulator, you will be shown with login form. For fist time use, create your new account. If you already have an account then login with your account and go to steps 5.Step 3: Fill register form
Fill all textbox with your personal data. Make sure email address you are using still active. It will useful if you forget your password someday. After you complete insert data then click “Create Account”.Step 4: Login with your new account
After create new account you will be redirected to login page. Input your username and password you have been created before then click “Login”. You will be redirected to your PLC simulator page. Here you can create your own PLC program.Step 5: Start new program
Start to create new program by clicking “New” button. Click normal open contact input symbol then click on the line at left side of rung. Do again for normal open output coil on the right side of rung.You will get the following capture.
Step 6: Insert input and output parameter
Edit value of input and output parameter by click on question mark above symbols. Insert “I/0” to set port 0 input to be active and “O/0” to set port 0 output to be active. Use “Enter” key to confirm your edited value. Don’t forget to use this key because your program will not run correctly if you forget it.Step 7: Run your program
Click “Run” and see how your program work on simulator. You can press input 0 and observe what happening with output 0 indicator.Step 8: Press input 0
Press input 0 and wait for a second. If your program works correctly, you will find that output 0 change to green. If your program not work like this, then maybe you forget to press “Enter” after change port’s parameter.Step 9: Stop program
To stop your program running continuously, click stop button under run button. If your program not work correctly, then you can edit input and output parameter. Don’t forget to use “Enter” key this time to confirm your new value.Step 10: Delete instruction
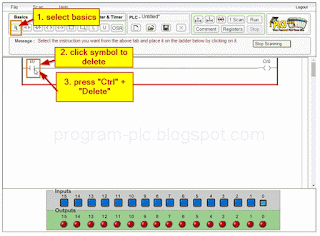
To delete your instruction you have to do some tricks. Select basic instruction first then click symbol you want to delete. The last step is press “Ctrl” + “Delete” key simultaneous.The symbol you choose will disappear immediately.
Step 11: New, insert, and delete rung
To insert new rung at the bottom you can use “Append Rung” button. New rung default position is always at the bottom.To insert new rung at the position you want, you can use “Insert Rung” button. First you have to click the rung that you want to be under your new rung. Then click insert button. Your new rung will added above your chosen one.
To delete rung you have to click your intent rung first. Then click “Delete Rung” button. Your intent rung will disappear soon.
Step 12: Save your work
You can save your project at the server or locally. To save your project at server you just need to click “Save” button, then type your file name and click save. To save on your local computer you need to press “Ctrl” simultaneous with save button. After saving your work, you can open it with open button near save button. To open from server, simply click open button. To open from your local you have to press “Ctrl” simultaneous with open button. Create new project can be done by click new button. It’s just like to save, open, and create new file with text editor on your desktop.Video Demonstration: Learn PLC Programming Online


